
Don’t Give Up! The Secrete to Fixing a Lawnmower Pull Cord

How to Fix a Lawnmower Pull Cord

Few things are more frustrating than going to cut the grass or clear your driveway of snow and ending up with the starter cord in your hand. Eventually, it happens to everyone. When it does, check out this video on how to fix a lawnmower pull cord.

video
play-sharp-fill

Steps for fixing a lawnmower pull cord

1) Remove the recoil

First, remove the recoil from the engine. Most are held in place with three to five bolts. After removing the recoil, remove the broken cord.

2) Measure and cut the old cord

Next, measure the old pull cord. Add about four inches to the overall length to account for the knots you need to tie on either end. Add additional length as needed if the cord broke farther from the handle.

Most of the time, however, the cord will break at the handle. In this case, you can simply reuse the existing cord. However, consider upgrading to a high-quality nylon cord for added durability.

Cut the rope to the appropriate length. Then, use a lighter to melt the ends. This seals the fibers and makes it much easier to thread the cord.

But the best seller is the ASE – Commercial 10W-30 which also qualifies as a SAE-30 weight. Available in Quarts, Gallons, cases and drums. It has all the components deleted from the automotive motor oils. No emission systems allows an oil more robust for these small sumps!

3) Tie on the handle

Remove the old lawnmower pull cord from the handle, feed through the new cord and tie a simple knot. Make sure the knot is nice and tight. Pull it back through the handle to help tighten the knot.

4) Load the recoil spring

The next thing you’re going to do is load the recoil spring. Turn the recoil in the direction that causes the engagement lugs to protrude. The engagement lugs connect the recoil to the engine and spin the flywheel.

Continue turning the recoil, making sure to apply enough pressure to prevent the spring from releasing and bloodying your knuckles.

Once you feel full tension on the spring, locate the hole on the pulley through which the starter cord threads. Align it with the outside hole on the recoil body.

5) Thread the new pull cord

With the two holes aligned, thread the new cord through about 12 inches. Make sure the cord isn’t tangled and then slowly release pressure on the recoil, letting it wind the cord for you until the handle is sitting against the recoil.

Next, tie a knot on the end of the cord. Pull the handle until the knot you just tied locks into place in the recoil pulley. Slowly let the cord retract.

6) Reattach the recoil to the engine

Finally, attach the recoil to the engine and you’re done. You just fixed your lawnmower pull cord.

What if the cord is too long?

You don’t have to go back and do everything over. Mark with a Sharpie where the cord meets the recoil. That’s where the handle should be.

Pull the cord out, keeping tension on the recoil. Make a loose knot near the recoil.

This provides slack to make a new knot where you made your mark earlier. Tie a good, tight knot and pull the cord back out, again keeping some pressure on the recoil so it doesn’t snap back. Untie the temporary knot you made earlier.

That’s how you fix a lawnmower pull cord. You’re ready to get back to cutting the lawn or blowing snow.

And for our Local customers, thank you for supporting our local store and local business!! We love Omaha our home town!

Steps To Maintain Your Snowblower – Things to Know

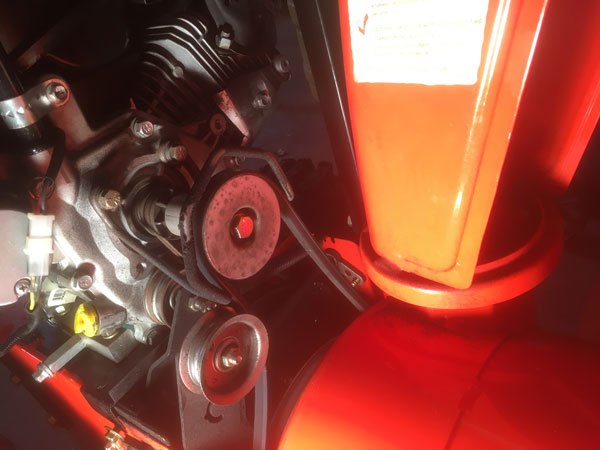
Never Overlook This When Maintaining Your Snowblower

Thanksgiving day, 2016. While my family was gathered in my dining room, imbibing spirits and making merry, I was in the shed disassembling the carburetor on my snowblower, reeking of petroleum as rivers of gasoline flowed under my jacket cuffs and saturated me to the elbows.

Here’s what happened, and here’s how to avoid it.

Snowblower maintenance can be distilled to this Golden Rule: Maintain your fuel system.

I’ll say it again: Maintain your fuel system.

A snowblower that won’t start is almost always due to a fuel problem. And nothing raises your blood pressure like a dead snowblower following the season’s first snowstorm. You know it! We always wait to the last minute on that first snow.

Preventing fuel-system problems starts in the spring prior to storage.

Leave the carburetor full of gas

This is where everything unraveled for me. One theory says that shutting off the fuel line and running the engine until the carburetor empties helps prevent varnish that plugs the jets and prevents starting.

Wrong, at least in my case. As I discovered, leaving the carburetor empty and exposed to air hastens oxidation and varnish. Fluctuating temperatures and humidity throughout the summer invite varnish, and it doesn’t take much to plug the tiny orifices in a carburetor. Then, it’s just a matter of time before you’re stinking of gasoline on Thanksgiving day while blasting carb cleaner on everything within reach.

Instead, add fuel stabilizer at the end of the season, run the engine for a few minutes to distribute the treated gas throughout the system, then shut down the engine. Now you can shut off the fuel line for the summer. The treated fuel in the carburetor bowl provides protection and helps keep components clean.

Some people claim you should run the carburetor empty since the gas will evaporate anyway. That may be true, but evaporation takes time, and the carburetor will at least be protected in the interim.

Stabilize the gas

As mentioned, treat gas with stabilizer prior to storage. Stabilized fuel protects against oxidation and varnish throughout the summer.

Use ethanol-free gas

When water infiltrates your gas tank in the form of melted snow, it can cause phase separation, a phenomenon that occurs when the bond between ethanol (present in most gasoline sold today) and gasoline breaks. When this ethanol/water mixture enters the combustion chamber, it creates a lean-burn situation that can damage your engine.

For best performance, use 91-octane, non-oxygenated (ethanol-free) gas. Many gas stations offer non-oxygenated gas and advertise it for powersports and off-road use. It’s a little more expensive, but spending a few extra dollars a winter to help your $1,000 dollar machine run strong isn’t a factor, in my opinion. At the very least, use ethanol-free gas during storage to help ward off phase separation.

Perhaps test your gas to see if it is really and truly ethanol free. I know many who say “I never use ethanol” and after testing the source gasoline it turned out to be laced with ethanol! Put your gas in a glass jar and see if you see it separate over time. Sometime you need to shake it up.

(Find out how to fight ethanol problems in small engines.)

If you use ethanol-blended gas, consider continuous use of a fuel additive, such as AMSOIL Quickshot, formulated to address ethanol-related performance issues.

Change The Oil in the Spring

Used oil contains acids that can slowly corrode metal components. Prior to storage, change the oil to remove acidic byproducts and ensure maximum protection throughout the summer. After changing oil, I like to run the engine for a couple minutes to distribute oil throughout the lower end of the engine.

Fog the engine

Use fogging oil to protect the upper end (cylinder, piston, valves) from corrosion during storage. Remove the spark plug, which provides the perfect time to inspect its condition, and spray a little oil into the cylinder. Slowly pull the starter cord a few times to distribute the oil, then replace the plug.

Check the gear housing – It can fail!

Clean any debris from around the filler port on the auger gear housing, remove the plug and ensure the gear lube level is up to the top. If not, add the correct lubricant (check your owner’s manual for viscosity).

Inspect belt condition and linkages

Stressing a worn belt after it’s sat idle for months is a recipe for a breakdown. When a belt does break, it’s often while clearing the first big snowfall of the year. Spring is the prime time to check the condition of drive belts and linkages. It’s much easier and far more comfortable to crawl around your snowblower on a mild, spring day than in the winter.

One final word of advice: Keep an eye on the weather at the start of winter. When the forecast calls for the first snowstorm of the season, start your snowblower a few days early to ensure it’s ready to go.

That gives you plenty of time if your snowblower won’t start – like about two hours on Thanksgiving day – to fix any problems.