
Steps To Maintain Your Snowblower – Things to Know

Never Overlook This When Maintaining Your Snowblower

Thanksgiving day, 2016. While my family was gathered in my dining room, imbibing spirits and making merry, I was in the shed disassembling the carburetor on my snowblower, reeking of petroleum as rivers of gasoline flowed under my jacket cuffs and saturated me to the elbows.

Here’s what happened, and here’s how to avoid it.

Snowblower maintenance can be distilled to this Golden Rule: Maintain your fuel system.

I’ll say it again: Maintain your fuel system.

A snowblower that won’t start is almost always due to a fuel problem. And nothing raises your blood pressure like a dead snowblower following the season’s first snowstorm. You know it! We always wait to the last minute on that first snow.

Preventing fuel-system problems starts in the spring prior to storage.

Leave the carburetor full of gas

This is where everything unraveled for me. One theory says that shutting off the fuel line and running the engine until the carburetor empties helps prevent varnish that plugs the jets and prevents starting.

Wrong, at least in my case. As I discovered, leaving the carburetor empty and exposed to air hastens oxidation and varnish. Fluctuating temperatures and humidity throughout the summer invite varnish, and it doesn’t take much to plug the tiny orifices in a carburetor. Then, it’s just a matter of time before you’re stinking of gasoline on Thanksgiving day while blasting carb cleaner on everything within reach.

Instead, add fuel stabilizer at the end of the season, run the engine for a few minutes to distribute the treated gas throughout the system, then shut down the engine. Now you can shut off the fuel line for the summer. The treated fuel in the carburetor bowl provides protection and helps keep components clean.

Some people claim you should run the carburetor empty since the gas will evaporate anyway. That may be true, but evaporation takes time, and the carburetor will at least be protected in the interim.

Stabilize the gas

As mentioned, treat gas with stabilizer prior to storage. Stabilized fuel protects against oxidation and varnish throughout the summer.

Use ethanol-free gas

When water infiltrates your gas tank in the form of melted snow, it can cause phase separation, a phenomenon that occurs when the bond between ethanol (present in most gasoline sold today) and gasoline breaks. When this ethanol/water mixture enters the combustion chamber, it creates a lean-burn situation that can damage your engine.

For best performance, use 91-octane, non-oxygenated (ethanol-free) gas. Many gas stations offer non-oxygenated gas and advertise it for powersports and off-road use. It’s a little more expensive, but spending a few extra dollars a winter to help your $1,000 dollar machine run strong isn’t a factor, in my opinion. At the very least, use ethanol-free gas during storage to help ward off phase separation.

Perhaps test your gas to see if it is really and truly ethanol free. I know many who say “I never use ethanol” and after testing the source gasoline it turned out to be laced with ethanol! Put your gas in a glass jar and see if you see it separate over time. Sometime you need to shake it up.

(Find out how to fight ethanol problems in small engines.)

If you use ethanol-blended gas, consider continuous use of a fuel additive, such as AMSOIL Quickshot, formulated to address ethanol-related performance issues.

Change The Oil in the Spring

Used oil contains acids that can slowly corrode metal components. Prior to storage, change the oil to remove acidic byproducts and ensure maximum protection throughout the summer. After changing oil, I like to run the engine for a couple minutes to distribute oil throughout the lower end of the engine.

Fog the engine

Use fogging oil to protect the upper end (cylinder, piston, valves) from corrosion during storage. Remove the spark plug, which provides the perfect time to inspect its condition, and spray a little oil into the cylinder. Slowly pull the starter cord a few times to distribute the oil, then replace the plug.

Check the gear housing – It can fail!

Clean any debris from around the filler port on the auger gear housing, remove the plug and ensure the gear lube level is up to the top. If not, add the correct lubricant (check your owner’s manual for viscosity).

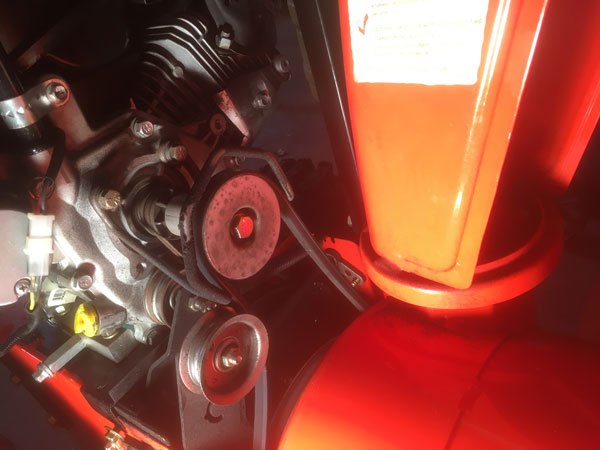
Inspect belt condition and linkages

Stressing a worn belt after it’s sat idle for months is a recipe for a breakdown. When a belt does break, it’s often while clearing the first big snowfall of the year. Spring is the prime time to check the condition of drive belts and linkages. It’s much easier and far more comfortable to crawl around your snowblower on a mild, spring day than in the winter.

One final word of advice: Keep an eye on the weather at the start of winter. When the forecast calls for the first snowstorm of the season, start your snowblower a few days early to ensure it’s ready to go.

That gives you plenty of time if your snowblower won’t start – like about two hours on Thanksgiving day – to fix any problems.

What’s the Minimum I Should Drive My Car? And Other Winter Car Storage Tips

What’s the Minimum I Should Drive My Car? And Other Winter Car Storage Tips

The roads are home to all kinds of vehicles. Daily drivers that clock thousands of miles each year. Seasonal vehicles that only clock hundreds. And then there are some whose odometers move only when being loaded or unloaded from a trailer.

In any instance, winter vehicle storage is sometimes inevitable.

What to consider when storing your vehicle for winter

There are several things to consider when storing a vehicle. Read on for some tips to ensure your vehicle is ready to answer the call when you awaken it from its storage-time slumber.

1) Seek shelter

There are plenty of good locations for storing your vehicle. Here are a few.

  • Garage – If you own a garage, it’s the obvious first choice to protect your vehicle from the elements, pests or thieves during storage. Ensure that all entries are secure, including windows or side doors.
  • Storage facility – If you live in an urban area or you don’t have access to an enclosed space, consider renting space at an indoor storage facility. There are businesses geared toward storing vehicles. Depending on your region’s weather, some offer both indoor and outdoor options.
  • Friends or family – If the above options don’t work, call in a favor with a family member or good friend who has space in his or her garage, shed, barn or other secure building.

Outdoor storage isn’t ideal, but if it’s your only option, buy a quality weatherproof cover that will protect your vehicle from the elements. There are tons out there ranging from low quality to virtually impenetrable, so do your research to find the best one capable of properly covering your ride.

Covers are effective at protecting the body of the car, but consider the underside of the vehicle. Parking on a concrete slab will help avoid moisture from the ground collecting under the cover and causing rust damage from the bottom up.

2) Clean your vehicle before storage

When you let your car sit for long periods of time you want to make sure it’s thoroughly clean. Even small amounts of the following can damage the paint.

  • Water droplets
  • Salt from the road or the air
  • Sand and dirt
  • Bird droppings

Show your vehicle some love by washing it well, completely drying it with a shammy and giving it a proper coating of wax. If you’re really feeling fancy, use a clay bar to remove dirt trapped inside the paint.

Inside the vehicle, vacuum all dirt, debris and crumbs. Even small crumbs will attract insects and rodents.

3) Keep out the undesirables

Speaking of which, mice and other rodents love finding a good stationary vehicle to hole up inside for the winter. They’ll build a nest in an inconvenient place, chew through wires and wreak general havoc during their uninvited stay.

Keep them out by closing off any entry points such as the exhaust and air intakes. Dryer sheets are an effective deterrent, so try placing those in and around the vehicle to deter them from considering your vehicle as a winter home.

4) Check fluids & fill ‘er up

Perform an oil change prior to storing a vehicle. This will keep the engine from holding harmful contaminants for a lengthy period of time.

Add a fuel stabilizer to prevent the gas from deteriorating, then fill up the gas tank to prevent moisture from accumulating. AMSOIL Gasoline Stabilizer is an excellent choice. It’ll inhibit the oxidation process in stored fuel, which will help prevent sludge and varnish from clogging injectors, fuel lines, carburetors and other components. Keep the fuel as fresh as possible since deteriorated fuel makes up the highest percentage of problems associated with vehicle storage.

5) Take it for an occasional spin

Start the vehicle every two weeks and take a short 10-minute drive if possible. A battery that is not used will soon lose its charge and lead to a headache later on.

If you’re looking at long-term vehicle storage, it’s not a bad idea to disconnect and remove the battery entirely. Or, purchase a battery tender and connect that instead. Doing so will deliver a regular charge to keep the battery from losing all power. Look for one with an automatic shut-off feature so it’s not overcharged.

Regular startups or a short drive will also keep the engine and all its components lubricated, which is another important area requiring regular TLC. Just be sure to remove any rodent-repelling measures you may have taken earlier, like the dryer sheets in the exhaust pipe.

If you aren’t in a position to conduct routine starts or short drives, you’ll need something to prevent surface rust from accumulating on engine components. A good coat of AMSOIL Engine Fogging Oil sprayed into the cylinders will do the trick.

6) Mind the Tires

This is another important area to consider, as they are what the vehicle rests on for the duration of the storage period. First, make sure the tires are properly inflated to the correct psi before storage. Sitting vehicles can create flat spots on tires that render them useless later on.

If you won’t be driving at all, roll the vehicle forward or backward a few inches from time to time.

You can do this when you conduct the occasional engine start to keep the battery alive and engine parts properly lubricated. For those who don’t mind a bit of extra work to ensure road-ready tires later on, you can also take them off entirely and replace them with jack stands.

Based on your environment you can pick a storage protocol and do the best you can. Just be aware that vehicles don’t like to sit for extended periods and need opportunities to “stretch their legs,” so to speak. They need to be started and moved at least once per year to keep seals from drying out and internals coated with oil. Follow our vehicle storage advice and your ride will be ready for the road when you are.