
New ATV/UTV Oil Change Kits Offer Maximum Convenience

New ATV/UTV Oil Change Kits Offer Maximum Convenience

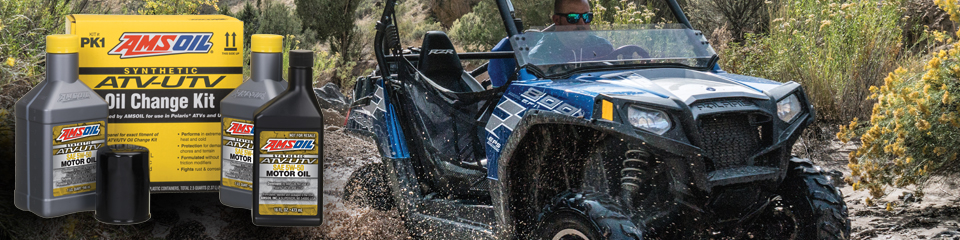
AMSOIL ATV/UTV Oil Change Kits combine everything needed to perform an oil change on the most popular models of Polaris* ATVs and UTVs in one convenient package, including…

To find the correct ATV/UTV Oil Change Kit for your machine, consult the appropriate Product Guide.

Look up My ATV

Look up My UTV

WHY YOU SHOULD UPGRADE YOUR ATV/UTV PROTECTION

Accessories equal weight. It’s common to burden your UTV or ATV with accessories designed to increase power or productivity, especially for UTV owners. Enthusiasts often add roof and door panels, a winch, a plow, skid plates and other accessories. Plus, how often do you haul a load of gravel or pull a trailer or other implement?

This all adds weight, and a good rule of thumb is that extra weight equals extra heat. Heat, in turn, causes lubricants to break down sooner, which places your engine and differentials at risk of wear.

Heat invites engine wear. The oil’s primary job is to form a protective layer on metal parts to keep them separated so they don’t rub together and wear out. High heat from the stress you place on your machine, however, can cause oils formulated for standard service to become thinner (lose viscosity). Oil that has lost viscosity can fail to develop an oil film of adequate thickness or strength to protect against wear.

Plus, high heat invites sludge and performance-robbing deposits inside the engine. Sludge can clog oil passages and starve the engine of oil, while deposits can cause the piston rings to stick or interfere with proper valve operation, leading to reduced engine compression.

Since compression equals power, over time your engine can make less power, limiting your ability to ride or work as effectively as possible. Eventually, deposits and sludge can wreck the engine completely.

Shift to better performance. The story is similar inside the transmission, differential and front drive. All the extra weight and stress of hard work and performance riding concentrates intense pressure on gears. The lubricant coats the gear teeth during operation, guarding against metal-to-metal contact and wear. The added stress, combined with high heat, can break the fluid film and literally squeeze the lubricant from between the gears, leading to wear. As with the motor oil, high heat causes the lubricant to thin, which negatively affects wear protection.

Upgrade to synthetic lubricants. So what’s the solution? Ride more conservatively? Haul lighter loads and work less?

Never. Upgrade to high-quality AMSOIL synthetic motor oil, differential and transmission fluid, front drive fluid and other lubricants, especially if you’ve modified your ATV or UTV for greater power or productivity. AMSOIL synthetic ATV/UTV lubricants don’t contain the impurities inherent to conventional lubricants, meaning they deliver better performance and last longer. Their naturally tough base oils resist extreme heat and maintain a strong protective film better than conventional products.

Think of synthetics as just another performance upgrade. You don’t think twice about dropping a few hundred dollars on a snowplow or work trailer. Over the course of your machine’s life, the few extra dollars you spend per oil change or transmission/differential service is a drop in the bucket by comparison.

*All trademarked names and images are the property of their respective owners and may be registered marks in some countries. No affiliation or endorsement claim, express or implied, is made by their use. All products advertised here are developed by AMSOIL for use in the applications shown.

Why You Should Be Wary About Using Break In Oil in Powersports Equipment

Why You Should Be Wary About Using Break In Oil in Powersports Equipment

Marco Navarro asks on our Facebook page about break in oil, with attention paid to powersports engines.  (Break in oil importance, drain interval on it, and applications. To include motorcycles and ATVs since life of engine is shorter and rebuilding occurs more often.)
Thanks for the question, Marco.

Let’s get to it.

Maintaining an engine is a constant fight against wear. Over time, wear not only results in expensive damage, it reduces compression, robbing your engine of power.

That’s why it can be tough to accept that “controlled wear” during a new or rebuilt engine’s break in period is critical to maximizing its power and longevity.

Take a seat

One of the primary reasons to break in an engine is to seat the piston rings, and that means allowing the rings and piston skirt to carefully wear down the peaks (called asperities) on the cylinder wall.

The images show what we mean.

Although a new or freshly honed cylinder appears smooth to the naked eye, it contains microscopic peaks and valleys. If the valleys are too deep, they collect excess oil, which burns during combustion and leads to oil consumption.

The sharp peaks, meanwhile, provide insufficient area to allow the rings to seat tightly. That means highly pressurized combustion gases can blow past the rings and into the crankcase, contaminating the oil and taking potential horsepower with it.

Breaking in the engine wears the cylinder-wall asperities, providing increased surface area for the rings to seat tightly. The result is maximum compression (i.e. power) and minimum oil consumption.

Getting the shaft

That brings us to the other primary reason to break-in an engine: to season, or harden, the flat-tappet cam. Flat-tappet cams can wear out faster than their roller-cam cousins, especially in engines modified with high-tension valve springs.

And cam wear is bad. Really bad. Worn lobes or tappets affect valve lift and duration, which reduces engine power and efficiency. In extreme cases, increased pressure can remove material from the lobes and deposit it in the oil, where it circulates through the engine and causes damage. Break-in helps harden the metal so it’s more resilient to wear.

That raises a critical question: How do we simultaneously allow controlled wear to the cylinder wall/piston rings while protecting the cam against wear? Those two tasks seem mutually exclusive.

In a word, oil

The solution is to use a properly formulated break in oil that allows controlled wear at the cylinder wall/piston interface, but that also protects the cam lobes and tappets from wear.

How do we accomplish this black magic?

Most break in oils, including AMSOIL Break-In Oil, use conventional base oils. Compared to their higher-quality synthetic counterparts, conventional base oils result in a thinner, less durable protective oil film on engine parts. The thinner fluid film allows controlled wear at the cylinder wall/ring interface.

But what about the cam? Won’t it wear, too?

ZDDP

That’s where anti-wear additives come into play. ZDDP anti-wear additives are heat-activated, meaning they provide wear protection in areas of increased friction. In this case, it’s at the cam lobe/tappet interface. The additives form a sacrificial layer on the surface of parts, which absorbs contact and helps prevent cam and tappet wear.

As a rule of thumb, a good break in oil should be formulated with at least 1,000 ppm ZDDP. At AMSOIL, we take it a few steps further; our Break-In Oil contains 2,200 ppm zinc and 2,000 ppm phosphorus.

How long does break in require?

Another rule of thumb states you should season a flat-tappet cam by running the engine above 2,500 rpm for 15 minutes.

As for seating the rings, our testing has shown it can take as little as seven dyno passes. That time varies depending on the engine, ring tension, cylinder hone and other factors.

If you don’t have access to a dyno, follow the engine builder’s or manufacturer’s recommendations. If none are provided, consult the recommendations on the break in oil label. In general, run the engine under light-to-moderate loads for about 500 miles. Again, that duration is a rule of thumb, but break in shouldn’t exceed 1,000 miles. Then, drain the break-in oil, install the synthetic oil of your choice and commence driving.

An engine dyno provides the best method of determining exactly when the rings are seated. You’ll notice a boost in horsepower as the rings seat. Eventually, horsepower will stabilize once the rings are seated.

Check out 5 Ways to Boost Horsepower for Under $500

You can also perform a leak-down test. Another, albeit more time-consuming, method is to remove the exhaust headers and check for oil residue in the exhaust ports. Presence of oil shows the engine burning oil, meaning the rings aren’t completely seated. Once the oil residue is gone, the rings are seated.

What about powersports engines?

Ask yourself a few questions about your motorcycle, ATV or other powersports application before using a break in oil:

  1. Does it have a wet clutch? If so, the break in oil may not be formulated for wet-clutch compatibility, leading to reduced performance.
  2. Does it use a shared sump with the transmission? Many motorcycles use one oil to lubricate the engine, transmission and primary chaincase. The churning action of transmission gears, especially in high-rpm applications, can tear apart – or shear – the oil if it’s not formulated to handle the stress. Using a break in oil not designed to handle high-shear applications can lead to damage.
  3. Does it have a dry sump? Some motorcycles store motor oil in a tank separate from the engine. Residual break in oil can collect in the system following the break in period and contaminate the service-fill oil. In this case, run the engine long enough to circulate the oil throughout the system and change it a second time to ensure the break in oil is completely removed.

Given the above challenges, we recommend breaking in a rebuilt powersports engine using the motor oil you’ve always used. Run it according to the original equipment manufacturer’s (OEM) new-engine recommendation, then change the oil. In short, treat it like a new engine from the factory.

For new engines, just follow the OEM guidelines. Typically they recommend a shorter interval for the first oil change to remove wear particles and contaminants from the factory. Then, change to the AMSOIL synthetic motor oil that’s recommended for your application and commence riding.